


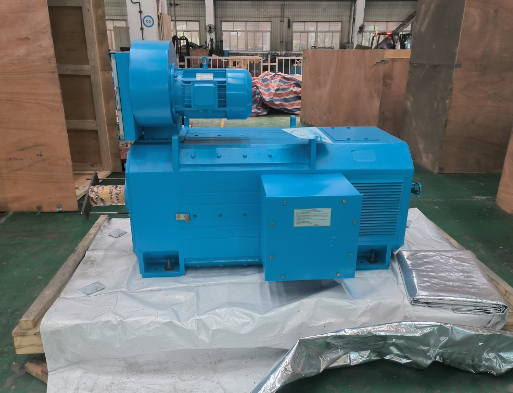


What do you need to do before the motor starts?
What Do You Need to Do Before the Motor Starts?
Before starting a motor, especially in an industrial or commercial setting, it’s essential to perform a series of checks and preparations to ensure safe and efficient operation. A motor, whether it’s a small electric motor or a large industrial machine, plays a critical role in powering various systems and equipment. Improper startup procedures can lead to inefficiency, mechanical damage, electrical failures, and even dangerous accidents. In this article, we will discuss the important steps that should be taken before starting a motor to ensure it operates at its best and lasts longer, while also safeguarding both the motor and the personnel working with it.

- Visual Inspection of the Motor
The first step before starting a motor is always a thorough visual inspection. This check is crucial to identify any visible signs of damage, wear, or potential hazards that could affect the motor’s performance. Here’s what to look for during the inspection:
Loose or Damaged Parts: Check for any loose bolts, screws, or parts. A loose component can cause vibrations, damage the motor’s structure, or even lead to motor failure.
Damaged Wiring: Look for any exposed, frayed, or damaged wiring. Damaged wiring can lead to electrical shorts, overcurrent situations, or even electrical fires if not properly addressed.
Debris or Obstructions: Inspect the area around the motor for any debris or obstructions that could interfere with its operation. Ensure that the motor vents are not blocked, as this could hinder the cooling process.
Corrosion or Rust: Examine the motor’s housing and components for any signs of corrosion or rust, which could compromise the motor’s integrity and performance, especially in high-moisture or corrosive environments.
- Check the Motor's Environment
The environment in which the motor operates can have a significant impact on its performance. Factors such as temperature, humidity, and cleanliness must be assessed before the motor is started. Here’s how you can ensure the motor’s environment is optimal:
Temperature Control: Ensure that the motor is not subjected to extreme temperatures that could affect its performance or safety. If the motor is located in a particularly hot or cold environment, consider installing temperature control or monitoring systems to ensure it operates within the specified temperature range.
Ventilation: Adequate ventilation is essential to prevent the motor from overheating. Ensure that air intake and exhaust vents are unobstructed, and if necessary, install additional fans or cooling systems to maintain an appropriate temperature.
Humidity: High levels of humidity can increase the likelihood of condensation inside the motor, potentially leading to short circuits or rust formation. Ensure the motor is operating in a dry environment or consider installing dehumidifiers if humidity is a concern.
Cleanliness: Dust, dirt, or other contaminants can get into the motor, damaging its internal components. Ensure that the motor and surrounding area are clean and that there are no obstructions in the air intakes or exhausts.
- Examine the Power Supply
Before starting the motor, you must check the power supply to ensure that the voltage and current supplied to the motor are appropriate for its specifications. Power issues can cause motor damage or inefficient operation. Here’s what needs to be checked:
Correct Voltage: Verify that the power supply voltage matches the motor’s rated voltage. An incorrect voltage can cause the motor to run inefficiently or damage it over time. If the voltage is too high or too low, the motor may experience overheating, reduced performance, or even failure.
Phase Balance: If the motor is a Three-Phase Motor, ensure that the phases are balanced. An imbalance in the phases can lead to inefficient operation, overheating, and eventual damage to the motor. Check for any possible phase loss, which could cause the motor to operate with only two phases.
Fuses and Circuit Breakers: Inspect any fuses, circuit breakers, or overload protection devices. These components are crucial in preventing electrical failures or fires. Ensure that the fuses are rated correctly for the motor’s current and that the circuit breakers are functioning properly.
Grounding: Proper grounding is essential to prevent electric shocks and ensure safe operation. Verify that the motor is properly grounded according to safety standards.
- Inspect the Motor's Mechanical Components
While electrical issues are often the most obvious, mechanical issues are just as important to address before starting the motor. The motor’s mechanical components must be in good working order to ensure smooth operation. These include:
Lubrication: Ensure that the motor bearings are adequately lubricated. Lack of lubrication can cause excessive wear, heat buildup, and premature motor failure. Check the lubricant levels and add more if necessary. If the motor uses grease, check for hardened or degraded grease and replace it as needed.
Alignment: Verify that the motor shaft is properly aligned with the connected equipment. Misalignment can cause excessive wear and stress on both the motor and the machinery it drives. A misaligned motor can also lead to vibration and inefficient performance.
Belts and Couplings: For motors that use belts or couplings to drive machinery, check these components for wear, damage, or proper tension. Worn-out or loose belts and couplings can lead to energy loss, mechanical failure, or even motor damage.
Motor Mounting: Ensure that the motor is securely mounted and properly fastened to prevent vibrations and to ensure that the motor remains stable during operation.
- Check for Overload Conditions
Before starting a motor, it’s essential to assess whether there are any conditions that could cause the motor to operate under excessive load. Overloading a motor can cause it to overheat and may damage its internal components. Here’s how to ensure that the motor isn’t overloaded:
Load Assessment: Verify that the load connected to the motor is within the manufacturer’s recommended limits. An excessive load can cause the motor to struggle and overheat.
Motor Protection Settings: If the motor is equipped with overload protection (such as thermal protection or current relays), check that these settings are properly configured for the motor’s rated load. Adjust the protection settings if necessary to ensure that the motor isn’t exposed to excessive load conditions.
Start-Up Conditions: Ensure that the motor is not expected to start under heavy load conditions. In many cases, motors are designed to start with minimal load to reduce the strain on their components. If necessary, reduce the load before initiating the start-up process.
- Test the Control Systems
The control systems of the motor, such as switches, starters, and relays, must be tested to ensure that they function correctly before starting the motor. Faulty control systems can prevent the motor from starting properly or even cause dangerous situations. Key areas to check include:
Motor Starter: Ensure that the motor starter is functioning correctly. A faulty starter can cause the motor to fail to start or lead to electrical malfunctions.
Overload Relays: Verify that overload relays and protection devices are set correctly to protect the motor from excess current and temperature.
Control Circuitry: Check the motor’s control circuit for any potential issues, such as loose connections, damaged wires, or malfunctioning relays. A fault in the control circuit can prevent the motor from starting or lead to erratic behavior during operation.
Safety Devices: If the motor has any safety devices, such as emergency stop buttons or limit switches, ensure they are functioning correctly and are easily accessible in case of an emergency.
- Test Run
Before starting the motor under full load, it’s always a good practice to perform a no-load test or dry run. This test ensures that the motor starts smoothly, runs at the correct speed, and operates within the desired parameters. During the test, observe the following:
Unusual Noises: Listen for any unusual noises, such as grinding, buzzing, or rattling, which could indicate mechanical issues or misalignment.
Vibration: Monitor for excessive vibrations, which can point to mechanical imbalances or issues with the motor’s foundation or mounting.
Temperature: Check the motor’s temperature after a short period of running. A motor that is running too hot could indicate an electrical issue, insufficient lubrication, or an overload condition.
Current Draw: Monitor the current drawn by the motor to ensure it is within the expected range. Excessive current draw could indicate a problem with the motor or the load.
Conclusion
Starting a motor is not as simple as flipping a switch; it requires careful preparation and inspection to ensure that the motor operates safely and efficiently. By performing a visual inspection, checking the power supply, ensuring proper lubrication, and testing the control systems, you can prevent motor damage, improve performance, and reduce the risk of accidents. Taking these preventive measures before starting a motor is essential to keeping your equipment running smoothly and extending the lifespan of the motor. A little time spent on preparation can save you from costly repairs and downtime in the future.